Back to Blog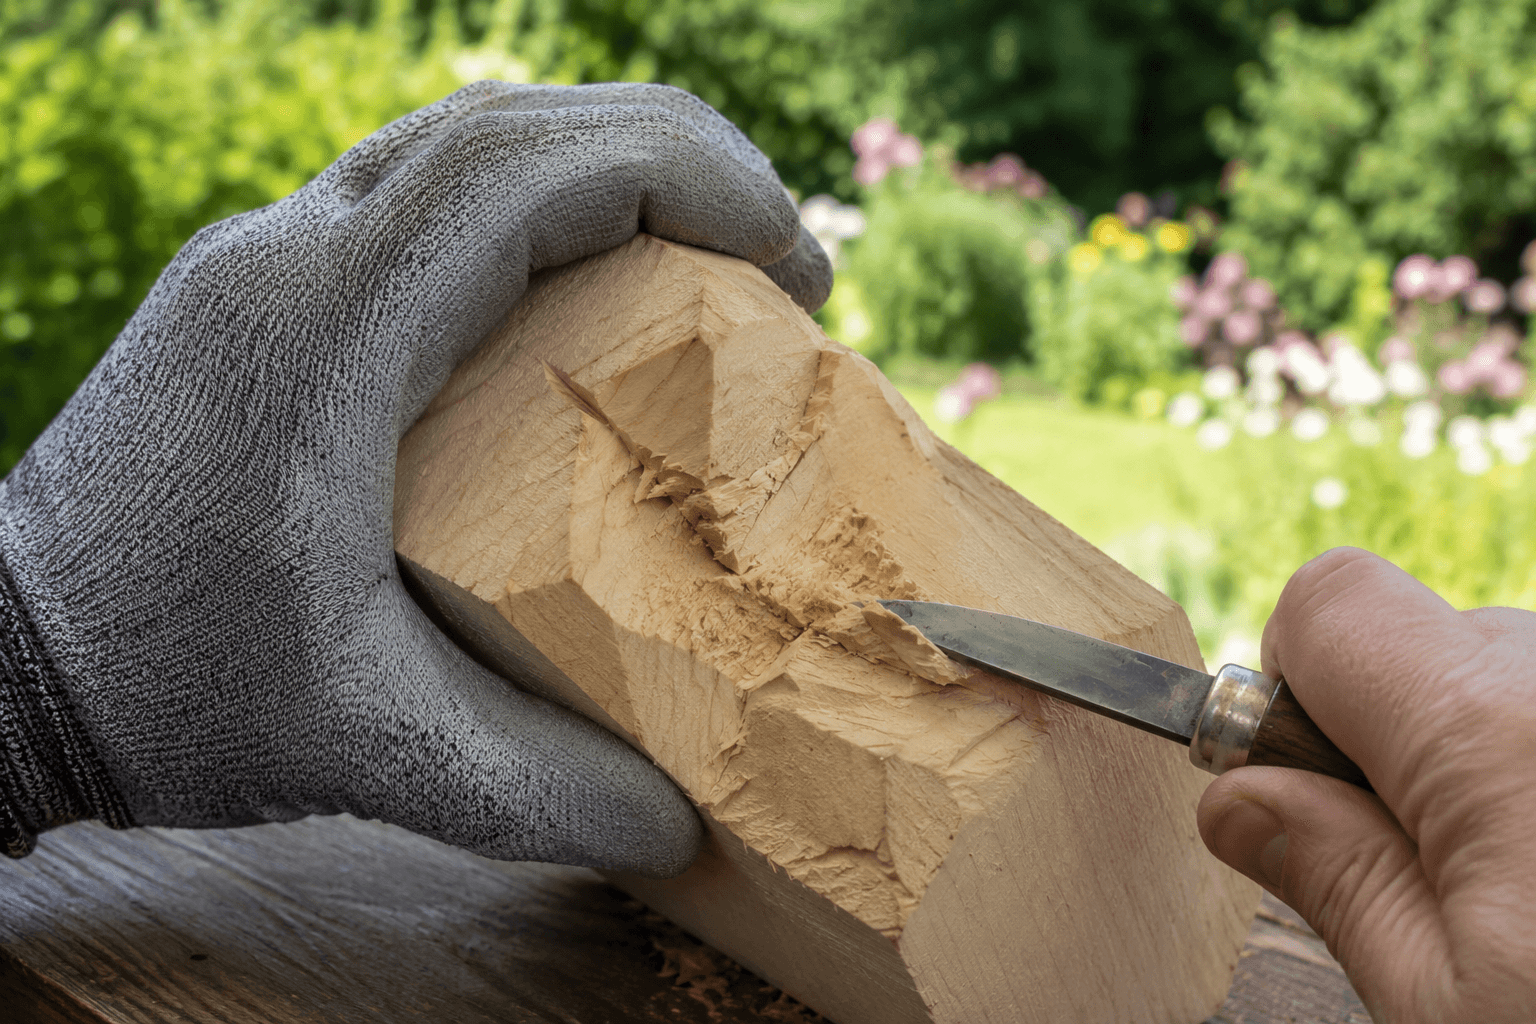
Why Does My Wood Tear While Carving?
This is called tear-out. It can look like fuzzy grain, chipped corners, rough cuts, missing chunks, or details that break off while you are trying to shape them. The fix is usually simple...
June 12, 2026
Wood usually tears while carving because the blade is lifting or splitting the wood fibers instead of slicing them cleanly.
This is called tear-out. It can look like fuzzy grain, chipped corners, rough cuts, missing chunks, or details that break off while you are trying to shape them.
The most common causes are:
- Cutting against the grain
- Using dull tools
- Taking cuts that are too deep
- Using brittle, knotty, or difficult wood
- Carving fragile details without enough support
The fix is usually simple: use sharper tools, take lighter cuts, change cutting direction, and choose better carving wood.
What Is Tear-Out?
Tear-out happens when wood fibers break ahead of the blade instead of being cut cleanly.
Wood is made of long fibers. When your tool slices across those fibers cleanly, the surface looks smooth. When the tool gets underneath the fibers and lifts them, the wood can split, chip, or crumble.
Wood Carving Illustrated explains that grain affects every cut a carver makes. If the knife or gouge gets between the wood fibers instead of cutting them cleanly, the fibers can tear apart and the wood can split.
That is why tear-out is not always about strength. Pushing harder usually makes it worse. The goal is not to force the tool through the wood. The goal is to slice the fibers in the right direction with a sharp edge.
Cause #1: You Are Cutting Against the Grain
Grain direction is the biggest reason wood tears.
When you carve with the grain, the blade cuts more smoothly. When you carve against the grain, the tool can lift the fibers and pull them apart.
A simple way to understand this is to think about petting fur. One direction feels smooth. The opposite direction lifts everything up. Wood grain behaves in a similar way.
If your tool suddenly starts digging in, chattering, or pulling up rough chunks, stop. Turn the wood or approach the cut from the opposite direction.
A carving guide from School of Wood Carving recommends carving with the grain to reduce splintering and tear-out, while using shallow cuts and adjusting direction as the grain changes.
Quick test
Make a light cut in one direction.
If it feels smooth and controlled, keep going.
If it feels rough, forced, or starts lifting fibers, reverse direction.
Cause #2: Your Tools Are Dull
A sharp tool slices. A dull tool crushes.
Dull knives, gouges, and V-tools require more pressure. That extra pressure makes the tool act like a wedge, which can split the wood instead of cutting it.
This is especially noticeable around small details like:
- Eyes
- Noses
- Beards
- Hat brims
- Hands
- Animal ears
- Ornament edges
If your tool feels like it needs to be pushed hard, stop and strop it.
Many beginner carvers think they need to fully sharpen their tools every time. Often, they only need to strop. Stropping polishes the edge and helps it cut cleanly again.
A good habit is to strop before carving and again whenever the tool starts dragging.
Cause #3: Your Cuts Are Too Deep
Trying to remove too much wood at once can cause tear-out.
Deep cuts put more pressure on the fibers. Instead of shaving the wood away, the blade can split off a chunk.
This is one of the easiest problems to fix.
Take smaller cuts.
Multiple light cuts are safer, cleaner, and easier to control than one heavy cut. This is especially important when carving across the grain, near end grain, or around delicate details.
Woodcarving Illustrated forum advice from experienced carvers often points to the same fix: use razor-sharp tools and take multiple smaller cuts instead of one deep cut.
Cause #4: The Wood Is Fighting You
Sometimes the problem is not your technique. It is the wood.
Some wood is harder to carve cleanly because it has knots, cracks, wild grain, alternating hard and soft growth rings, or brittle fibers.
For beginners, basswood is usually the best choice. It is soft, consistent, and easier to carve than many other woods.
Avoid learning on wood that has:
- Knots
- Cracks
- Twisted grain
- Very hard spots
- Very soft, crumbly areas
- Unknown scrap wood
Even basswood can vary. A poor piece of basswood may still crumble or tear, especially across the grain or near end grain. Experienced carvers note that sometimes the wood itself is simply not a good carving blank.
Cause #5: You Are Carving Fragile Details Too Aggressively
Small details tear more easily because they have less wood supporting them.
A nose, beard line, animal ear, hat brim, or ornament edge can break if you remove too much material too quickly.
When carving details, use light cuts and sneak up on the final shape. Do not try to finish the detail in one pass.
This is also where stop cuts help.
A stop cut is a boundary cut that prevents the fibers from splitting past a certain point. It gives your carving a clean edge and helps protect details.
For example, if you are carving next to a nose or hat brim, make a stop cut first. Then carve up to that line instead of pushing through it.
The Wood Whisperer describes the same basic idea in woodworking: scoring or scribing the fibers with a sharp blade before cutting helps leave a cleaner edge because the fibers are severed ahead of time.
How to Prevent Wood From Tearing While Carving
Use this checklist when your wood starts tearing.
1. Strop your tool
If the blade drags, crushes, or needs force, strop it.
2. Change direction
If the cut tears, reverse direction and try again with a lighter pass.
3. Take shallower cuts
Remove less wood at a time. Small cuts give you more control.
4. Use stop cuts
Protect details by cutting a boundary line first.
5. Use better wood
Start with clean basswood blanks. Avoid knots and cracks.
6. Watch the grain
Grain direction can change around curves, corners, and details. Adjust as you carve.
Can Wood Carving Stencils Help With Tear-Out?
A stencil will not directly prevent tear-out. Tear-out is mostly caused by grain direction, dull tools, heavy cuts, or difficult wood.
But a stencil can help you carve with more control.
When your layout is already clear, you know where the important cuts need to go. That makes it easier to plan your cuts, use stop cuts, and avoid randomly removing wood from fragile areas.
Ronan3D wood carving stencils are designed to give beginners a clear starting layout before carving. This helps you focus on the actual carving skills: tool control, grain direction, depth, and shaping.
For best results, pair the stencil with a matching tutorial so you can see the cut order before you start.
Browse Ronan3D wood carving stencils: https://www.ronan3d.com/products
Watch step-by-step tutorials: https://www.ronan3d.com/tutorials
What to Do If the Wood Already Tore
If the wood tears, stop cutting in that direction.
Then try this:
- Turn the wood and cut from the opposite direction.
- Use a sharper tool.
- Take lighter cuts.
- Clean the rough area carefully with a knife or gouge.
- Adjust the design if needed.
Small tear-out can often be cleaned up. Larger tear-out may need to be worked into the design. A broken edge can become deeper texture, a beard line, a shadow, or a simplified shape.
Wood carving is flexible. Not every mistake ruins the project.
Final Answer
Wood tears while carving because the fibers are being lifted, split, or crushed instead of sliced cleanly.
The most common fixes are:
- Carve with the grain
- Keep your tools sharp
- Take shallow cuts
- Use stop cuts around details
- Choose clean basswood
- Reverse direction when the wood starts tearing
If you are new to carving, tear-out is part of learning how wood behaves. Once you learn to read the grain and keep your tools sharp, your cuts will become much cleaner.
FAQ
Why does my wood chip instead of carve smoothly?
Usually because you are cutting against the grain, using a dull tool, or taking too deep of a cut. Try changing direction, stropping your tool, and making lighter cuts.
Does dullness cause tear-out?
Yes. Dull tools crush and lift the fibers instead of slicing them cleanly.
What wood is best for avoiding tear-out?
Basswood is one of the best beginner carving woods because it is soft and usually has a consistent grain.
Should I carve with or against the grain?
Carve with the grain whenever possible. If the wood starts tearing, reverse direction.
Can I fix tear-out after it happens?
Sometimes. Small tear-out can be cleaned up with a sharp tool or light sanding. Larger tear-out may require reshaping the area.
Do wood carving stencils prevent tear-out?
Not directly. A stencil gives you a clear layout, but you still need sharp tools, light cuts, and good grain direction.
As an Amazon Associate I earn from qualifying purchases.
Watch related stencil tutorials
Pair this guide with Ronan3D video tutorials for step-by-step carving demonstrations and product walkthroughs.
Browse Tutorials